Mac에서 파일/폴더를 대량으로 잠금 해제하는 방법
부터 data recovery software needs root permission to access the hard drive, it might happen to some Mac users that the retrieved data changed to locked after data recovery due to the permission issue. What compounds the problem is that Mac doesn’t support bulk editing; for users with thousands of files/folders, it would be a daunting task to edit one by one.
Luckily, there is a simple solution that users can use to resolve the problem. Follow the steps below to learn how to do it.
Mac 컴퓨터에서 파일/폴더를 대량으로 잠금 해제하는 방법
Step 1: Create a new 폴더and transfer all recovered files/folders.
Step 2: Right-click on the folder and click on 정보를 얻다.
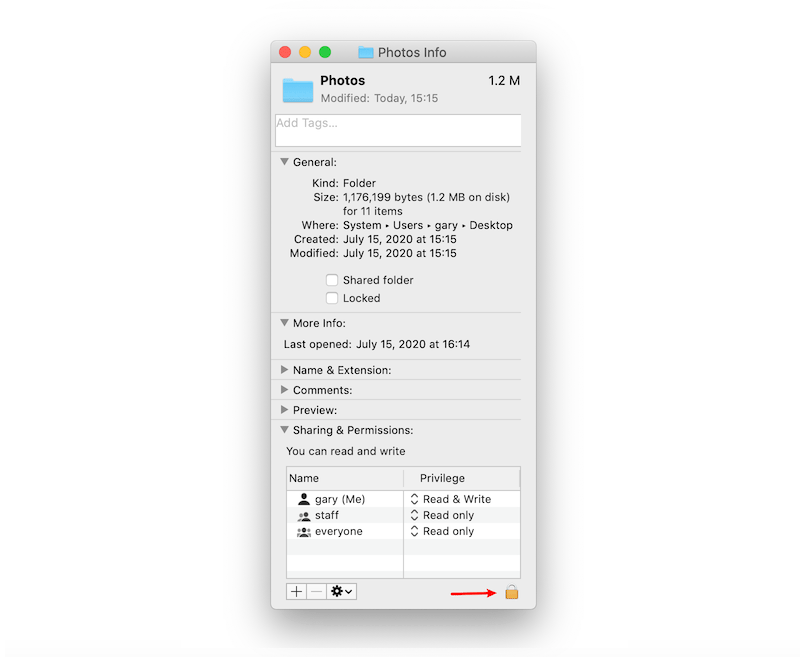
Step 3: Scroll down to find the 공유 및 권한 section.
Step 4: Click the 잠금 버튼 to unlock it, and enter your admin password.
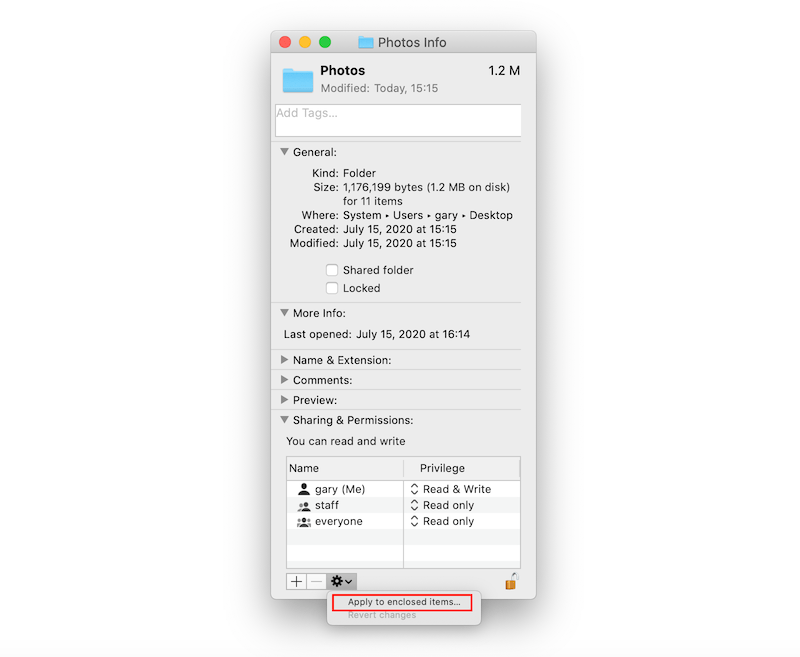
Step 5: Click the 휠 아이콘 and select 동봉품에 적용.
단계를 수행한 후 새 폴더의 모든 파일/폴더가 잠금 해제되었음을 알 수 있습니다.


