Effective Methods On How To Run CHKDSK On Startup
Summary: This article will introduce you to some simple and efficient methods to run CHKDSK on startup and recover data by using the Bitwar Data Recovery!
Table of Contents
Understanding CHKDSK Command on Windows
CHKDSK command is used in the Command Prompt to check and repair the system’s hard drive. Besides, Windows 10 follows the same procedure to run the CHKDSK command as its other versions. Still, in this case, you first have to offer the Command Prompt’s administrative privileges so that the command CHKDSK works appropriately.
When you try to check and repair problematic drive errors by following the methods below, there is a good chance that you may end up losing your vital data on the drive. Therefore, we will teach you how to backup or recover data by using the best data recovery for Windows first to prevent permanent data loss in your drive!
Recover Lost Data with Data Recovery Software
We will offer you the best and professional Bitwar Data Recovery to do the recovery job. It offers a 100% clean recovery scan and supports multiple file types from internal or external storage devices.
Step 1: Download and Install the recovery tool from Bitwarsoft Download Center.
Step 2: Select the Drive or Partition after launching the data recovery software and press Next.
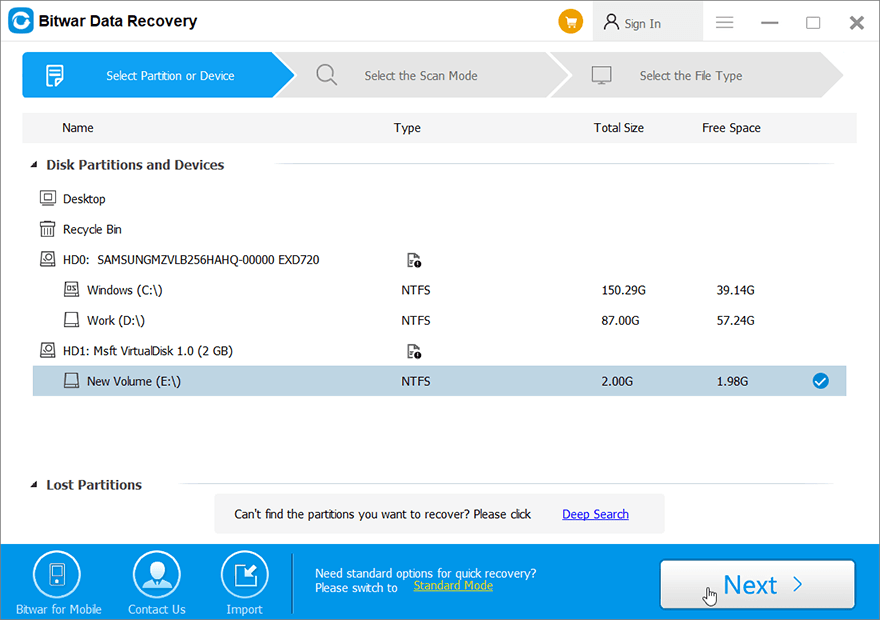
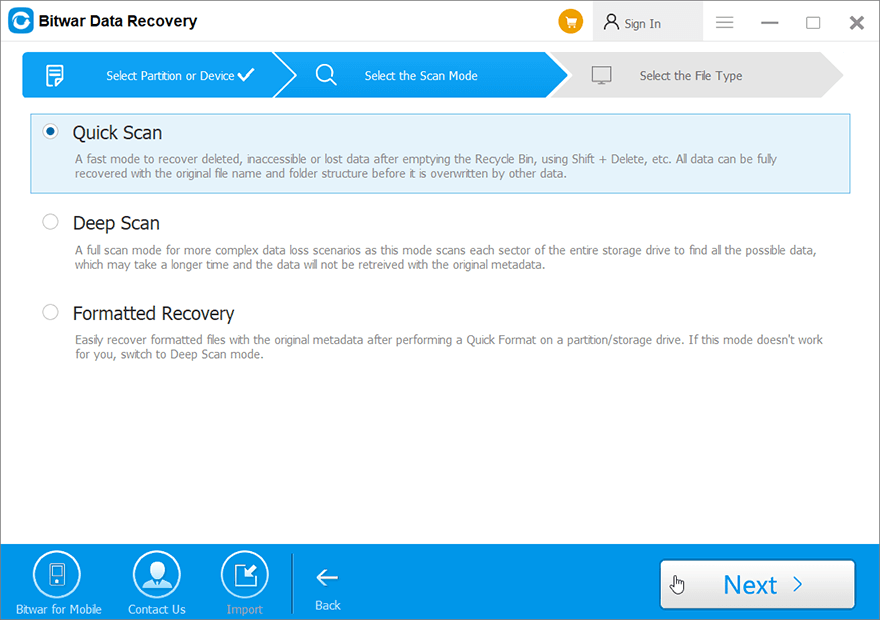
Step 3: Select the Scan mode, but it is recommended to choose the Deep Scan mode because it will search for all data types in every sector of your drive. Then, click on Next.
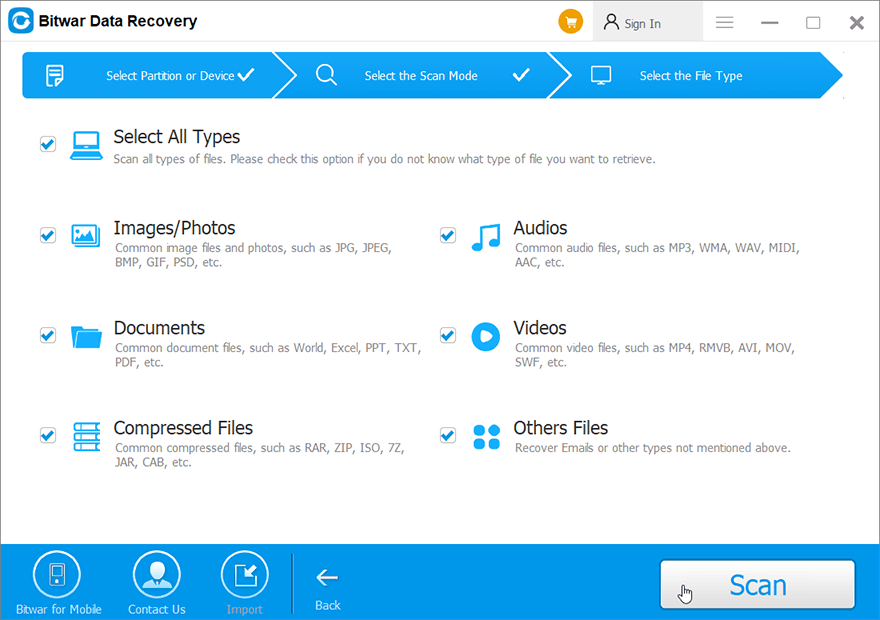
Step 4: Choose File types and press the Next button.
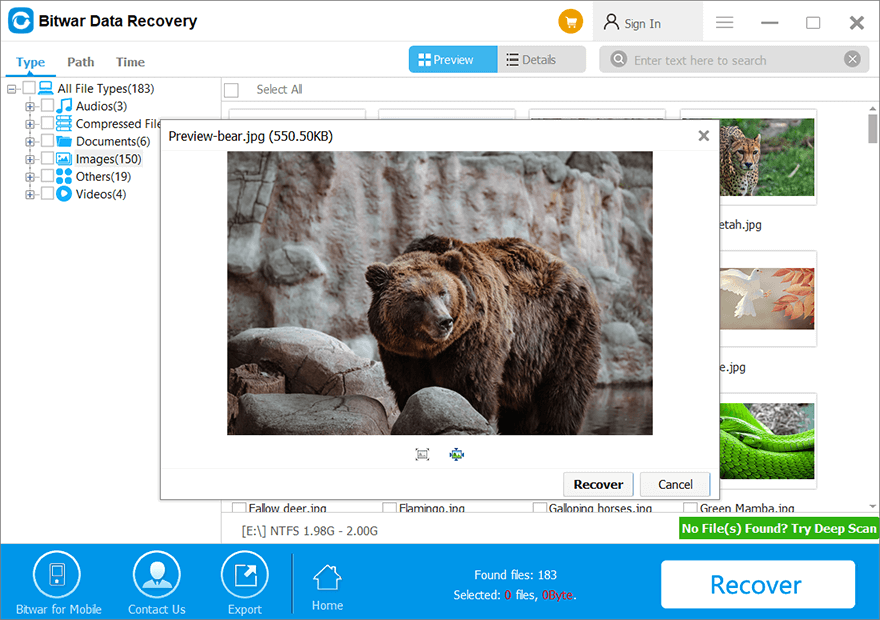
Step 5: Preview the data and select the required files, followed by clicking Recover to start the recovery process.
Effective Methods to Run CHKDSK on Startup
There are different methods to run CHKDSK in Windows 10, so refer to the methods below and choose which method is more easy and efficient for you.
Method 1: Recovery Disk or USB
You can use the recovery disk or USB to reboot your Windows 10 system into the Windows Recovery environment if it’s not booting. After this, go to Troubleshooting and then Advanced options to open the Command Prompt and run chkdsk/f/r command.
Method 2: Run CHKDSK on Reboot using Command Prompt
Step 1: Open Run box by pressing Wins + R keys and then type cmd to open Command Prompt.
Step 2: Type the command chkdsk C: /f /r /x in the Command Prompt and then press Enter. (Replace C with your drive letter)
Step 3: If you are trying to scan the C drive, CHKDSK will shoot a message saying that the current drive cannot be locked as another process has used it. Continue that it will ask you if you want this volume to be checked next time the system restarts: type Y and hit Enter.
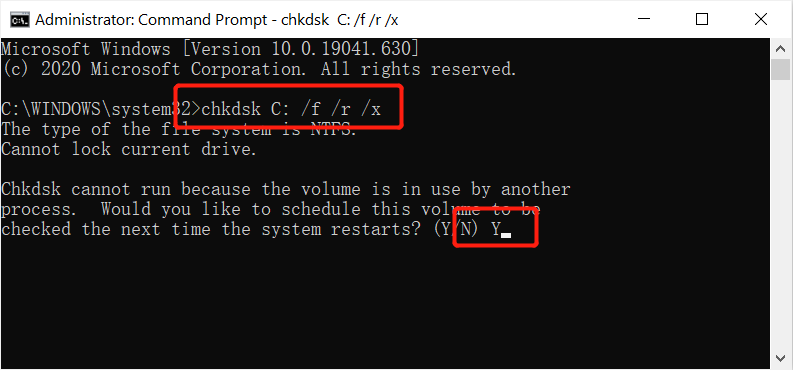
Step 4: Lastly, Restart your computer. Windows operating system will run CHKDSK automatically to check and fix any hard drive related issues.
Method 3: Advanced Options Screen
Step 1: Access advanced startup options by pressing and holding the Start button and Power button simultaneously. Advanced startup options will open.
Step 2: Follow the same steps mentioned in the second method to run CHKDSK in the Command Prompt.
Method 4: Open CHKDSK through Windows 7/8/10
Step 1: Tap on My Computer from your desktop and Right-click on the drive that has issues.
Step 2: Choose the Properties and Tools menu.
Step 3: Click on Check and Select your chkdsk options to solve the drive errors and recover bad sectors through chkdsk commands.
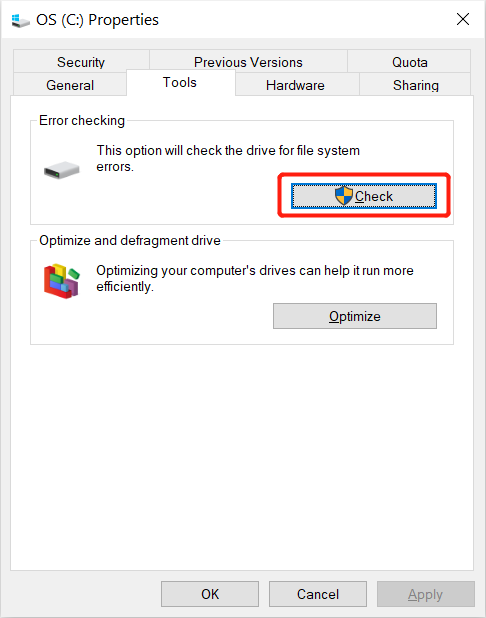
Take Note: Suppose that you tick on either box and you need to scan the hard drive on your operating systems; it will tell you to reboot the computer. By rebooting, the chkdsk will open before your computer starts.
Bonus Tips: How to Run CHKDSK Before Booting Windows 7/8/10
Step 1: Restart your computer and when the computer is loading, keep hitting the F8 key to open the Advanced Boot Options.
Step 2: Select the Safe Mode with Command Prompt option and allow the computer to continue booting. Then, a list of drivers will appear on the screen continue with the command prompt.
Step 3: Type in chkdsk and tap Enter to check on the drive, or you can refer below to learn other chkdsk commands:
- chkdsk command: chkdsk c:/f (Replace c with your drive letter) to open the chkdsk and fix errors.
- chkdsk command: chkdsk c:/r (Replace c with your drive letter) to locate sectors, get back data, and fix errors.
In case you face the prompt, you need to restart the drive because it is in use. Press Y to start reboot.
FAQ Run CHKDSK Command on Startup
Why will the chkdsk be stuck at a certain percentage for a long time?
It is a prevailing situation, and sometimes it takes about a few hours to finish the command depends on the memory space of the disk and drive. Please wait patiently, but if it stuck for about 10 hours or more, you could try to restart the command again.
Please note that your drive or disk is in bad condition as it takes more than 10 hours to run the command, so it is best to backup your data in the partition by using data recovery software.
Any damage will happen if you accidentally stop CHKDSK command?
It is impossible to stop the chkdsk when you start the process, and it is not safe to stop or force stop the process when it is still scanning the drive or disk. This action may cause your file system to corrupt and data loss. Please be very careful not to do any unnecessary actions when the CHKDSK command is ongoing.
How to stop CHKDSK on Startup on Windows 10?
Step 1: Tap Ctrl + Shift + ESC on your keyboard together to launch Task Manager.
Step 2: Look for the CHKDSK process in the task manager window. Then, right-click it and choose Details to check for PID of the CHKDSK task process.
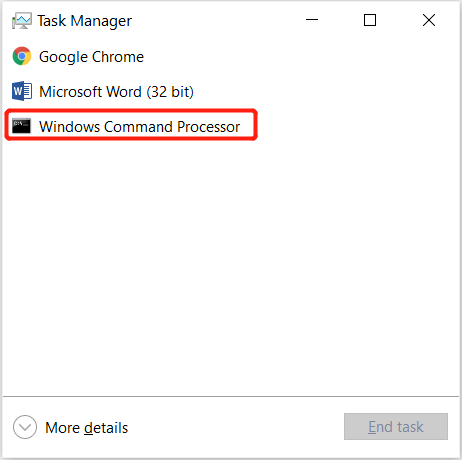
Step 3: Press Wins + R and type in cmd. Then, press Ctrl + Shift + Enter to launch the command prompt.
Step 4: Type in the command: taskkill /F PID PID number in the window and tap Enter.
Make sure to replace the PID number with the PID of CHKDSK that is shown in step 2.
Run It Easily!
Every user will run the CHKDSK command when there is an issue with our disk or hard drive on our Windows operating systems. There are many methods to run the command as mentioned in the lists above but remember to back up all the data first because it may lead to data loss.
In case your data is lost after running the CHKDSK on startup, refer to the mentioned data recovery steps above to use the reliable Bitwar data recovery software to retrieve all your lost data immediately from the storage device.
Previous Article
Full Guide to Fix Can’t Access USB Drive Windows 10 Error Summary: This article will introduce you to some simple and efficient methods to run CHKDSK on startup and recover data...Next Article
How To Change Or Remove Local Account Password? Summary: This article will introduce you to some simple and efficient methods to run CHKDSK on startup and recover data...
About Bitwar Data Recovery
3 Steps to get back 500+ kinds of deleted, formatted or lost documents, photos, videos, audios, archive files from various data loss scenarios.
Learn More
